|
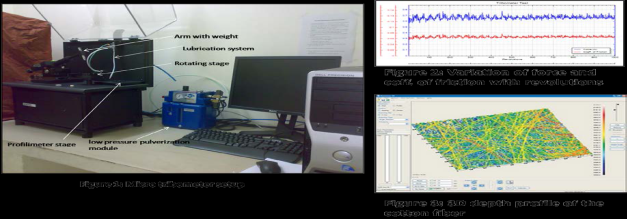
Wear of materials is one of the most important causes of failure of components like acetabular cup and ball etc. A detailed study of the principles of friction, wear and lubrication i.e. the tribological properties, is necessary to certify a material as a potential body implant. With the above intention a pin on disk tribometer set-up (Fig. 1) was procured from Nanovea Inc. USA.
Unique features:
Following are the main features of the micro tribometer:
-
Continuous force vs. coefficient of friction plot (Fig. 2)
-
Depth sensor based on white light instead of laser that provides much more accurate depth profile of worn sample
-
High Resolution non-contact 3D Profiler provides the profile of the wear track
-
Software create 3D imaging of the wear track
-
Vertical Resolution down to a few nanometers (~10 nm) and lateral resolution down to 1 μm are possible (Fig. 3)
-
Speed from 0.1 to 2000 rpm
-
Provides three lubrication modes:
-
Using a low pressure pulverization module, air is compressed and filtered then mixed with liquid to create a uniform spray that can be directed to the appropriate test zone.
-
A drop by drop lubrication with flow control
-
The soak option performs friction tests and wear tests under fluid in a specialized cup surrounding sample holder, allowing full submersion of the sample
|


