
LINUX on WINDOWS
Without Dual Booting
If you want to see a demo pl complete the steps given in [B. ClIENT side] and then contact Gopesh Tiwari gopesh@iitk.ac.in
Windows Users: Want to enjoy a Real Linux Desktop without having to dual boot? There is a way. NXserver installed on a Linux machine (which will be referred to as “server” hereafter ) and NXclient for windows on the Windows machine (which will be referred to as “client”) make this possible. It is completely free as opposed to earlier approaches of using Exceed as an XDMCP client.
This has been successfully tried on Fedora Core 5 and Mandriva 2006
This tutorial assumes you have a Linux machine (referred to here as a server). You could very well request your colleague who is a Linux user to add you as a user. Or, if your Lab has a Linux based server you can very well use that.
A. Server Side
Do the following on the server:
Download the following files into /tmp folder of the server:
Then install them in the following order:
nxnode, nxclient, nxserver
(use the command rpm –ivh <rpm file>)
When you are done, add a user in the nx database. In the example below we add the user “test” who is already a user of the Linux machine (exists in the password file)
[root@gt ~]# /usr/NX/bin/nxserver --useradd test
NX> 801 User: test uses SSHD authentication.
NX> 900 Adding public key for user: test to the authorized keys file.
NX> 900 Verifying public key authentication for NX user: test.
NX> 900 Public key authentication succeeded.
NX> 301 User: test enabled in the NX user DB.
NX> 999 Bye.
B. CLIENT side
Now, do the following on the server:


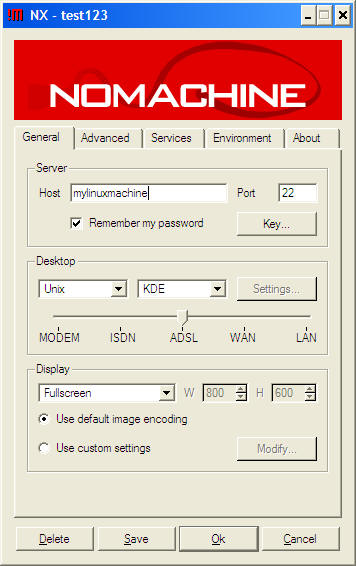
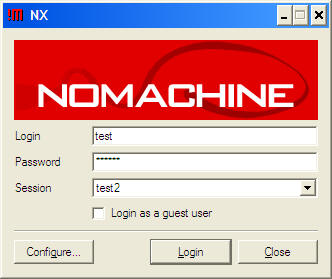
Fill the login details and press "Login" button. If all goes well you should be presented with your KDE environment in about a minute (first time it takes about a minute, which becomes faster from next use)